
So you're wanting to make your own bot using TulpaBox? Well it's pretty easy to do! All you've got to do is follow this easy steps.
- To register a bot, you must type this command "tul!register Name <text>", but replace "Name" with the character's name, and set the brackets to either one character or your own brackets. One you press enter, it should show a message, telling you that the Tupper has been registered.

- To give your bot an avatar, you're going to need to type the following command: "tul!avatar "Name"" (Name should be replaced with your bot's name. Don't press enter yet. Instead, click the + button. Then choose an image and post it. Now just press enter, and the avatar will be set.

- You're almost done. In order to test and see if the bot works, type a message with the brackets you've set for the said bot. When you press enter, you'll see your username and avatar for a second, but it will quickly be replaced with the bot's name and avatar.
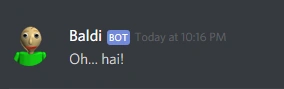
This shows that the bot is in working condition. If the bot doesn't load or it just shows your name and avatar with no change, then you might've messed up when creating the bot.
Congratulations, you've just made a bot using the Discord Tupperbox bot. With a Tupperbox bot, you can chat with people as a different person/character and you can even use it for roleplaying!
Hope this tutorial helped and that it helped you understand how to make your own bots.
Mideval Roblox (talk) 05:29, April 24, 2019 (UTC)Mideval Roblox